magical_girl_sandbox: Inner Sailor Moon senshi triumphant after another fight. Tuxedo Mask took this picture. (Default)

Modding SimPE files with AutoIT – V1.0: 03/14/2020


 ***WARNING: HIGHLY EXPERIMENTAL. USE AT YOUR OWN RISK!***

***For use with Windows OS only!***


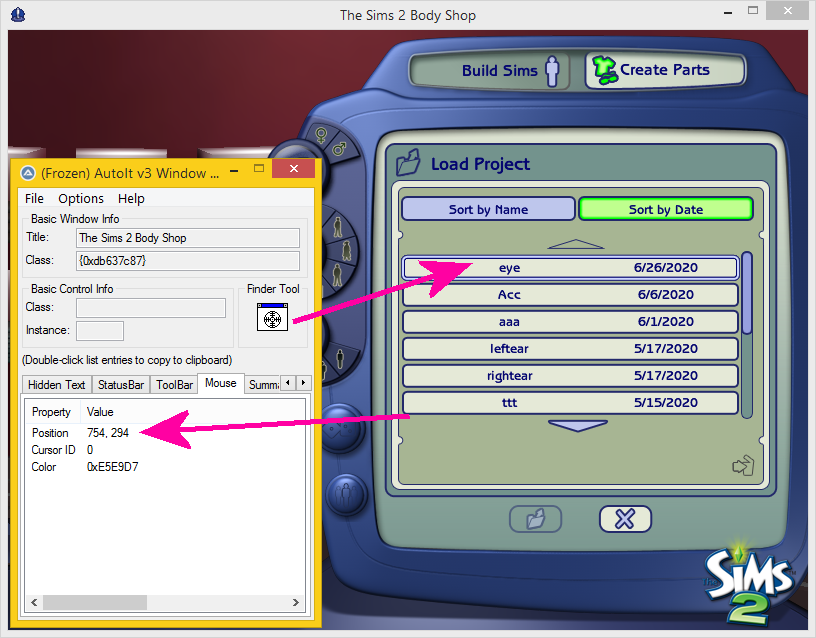
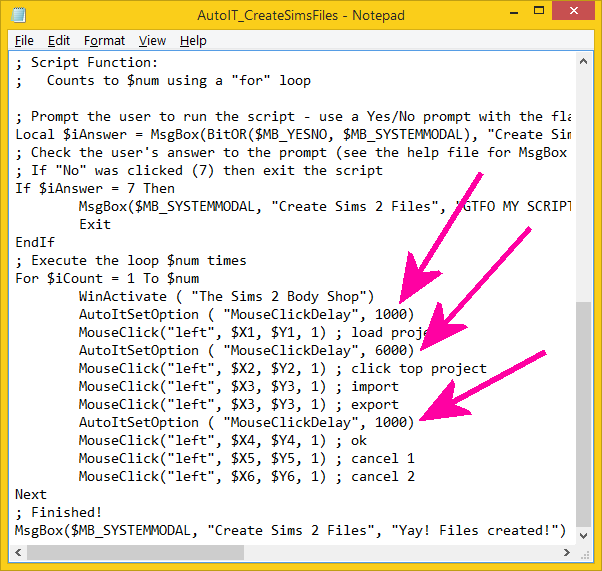
After the relative success of figuring out how to automate creating Sims 2 files in Body Shop, I set out to try to automate SimPE too. It took me several tries, but through trial and error, I managed to cobble some working codes together. Here’s how it works: AutoIT can send keypresses to a program – for example, it could type some letters in a document without a physical person having to type those letters in the keyboard.

I noticed one day that you can move from panel to panel in SimPE using the tab key, and that the up and down keys could move the selection within the panel. This meant that I could create a script that would open a SimPE file, navigate to the correct panel, and make a change to the file. For example, I could have the script open the BINX resource in a Body Shop file and edit the sort index. I could then have the script do this same task for a large number of files.

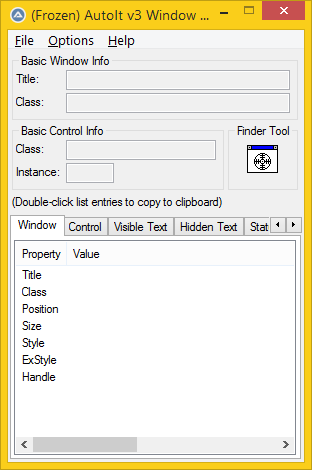
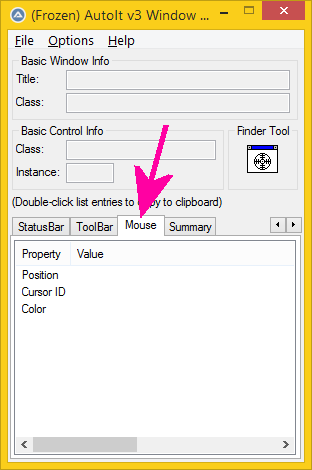
The first step to getting started with your own industrial SimPE factory is to download AutoIT. Make sure you find your Au3Info program included with your AutoIT installation. You’ll probably also want to familiarize yourself with the syntax and some example scripts. I've also made a few example scripts for you to look at. Please feel free to copy and paste anything from them into your own code!


Commands you should know:

WinActivate([Window Name]) and WinWaitActive([Window Name]) will either activate the window you specify, or wait until it becomes active. I used the first command to activate SimPE (and make sure my script was only running on that window), while the second was for waiting for an open file window to open.

If/Then commands: Start your statement with If, type your required condition, and then type Then. Go to a new line, indent, and type the results if your condition is met. End the statement on an indented line by typing EndIf.

For loops: Similar to if/then statements, start the line with For $[variable] = [start] To [end]. Indent the commands in the for loop. End the for loop with an unindented line with Next.

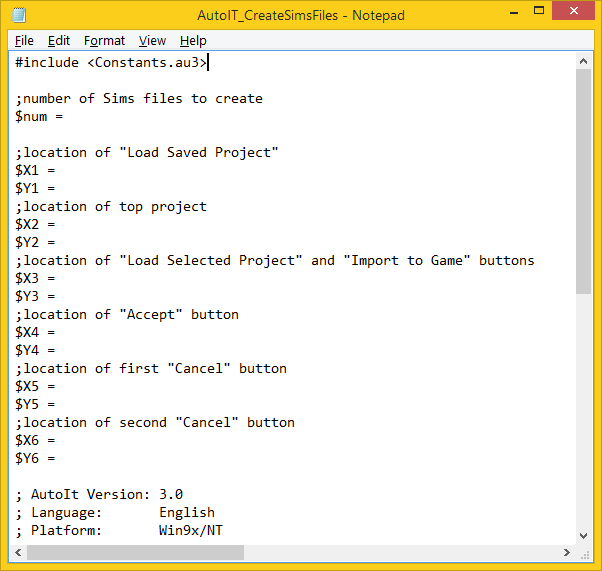
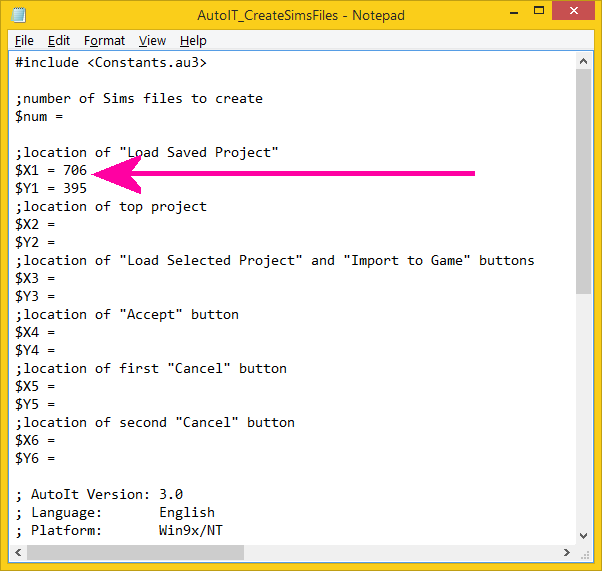
Variables: They’re declared by the $ character. For example, $i. To get lists to work with Send commands, you may have to declare the list as a global variable as in Global $list = [1,2,3,…]. Calling out one item in a variable list is done by $list[position #]. For example, the second item in the list above would be called by $list[2].

; will comment out a line. It’s probably a good idea to use this to explain what you’re doing with a particular command. I should probably use it too, but I don’t because I assume I will remember what everything means months down the line and then I am always surprised when I don’t. Don’t be me.

Sleep([# milliseconds]) will make your script wait for that many milliseconds before you move onto the next command. Useful if your computer is a dinosaur and lags a bit.

ControlClick("[Window Name]", "", "[Panel Name]", "[type of click]") will click somewhere on a panel. For the type of click, “left” will cause a left click, and “right” a rick click. The panel name can be found by using Au3Info. I had trouble getting this to work right, so I used it sparingly.

Send([“key #”]) will send a keypress to the program, with # being the number of times to press the key. You can leave out the number if you’re only pressing a key once.

                Key list:

                {TAB} is tab

{ENTER} is Enter

{DEL} is the delete key (Not the backspace key!!)

{PGUP} is page up

{PGDN} is page down

{UP} and {DOWN} are the up and down arrow keys

+ is shift

^ is control

Examples of usage:

To get the program to save, you’d use the command Send(“^s”). To move to a panel two steps backwards, you’d use the command Send(“+{TAB 2”}).

You can use a declared variable in a Send command too! If you want a key to be pressed a number of times expressed by your variable, you’d use Send("[key]" & $[variable] & "}"). If you want a variable to be typed as is in the program, you’d use Send($[variable],1).


Tips and Tricks:

I had a lot of crashes and files get changed erroneously while trying to automate SimPE. Backup your Sims files before you run any script! Also, something to consider, you might want to add something like an if command/while loop that prevents keys from being pressed if SimPE/the file open windows are not active. I might add this to my stuff in the future.


Before you start a script, open up a file in the directory you need to change things in. Theoretically, you could use your tab commands to move into different directories, but this will get complicated. For simplicity’s sake, place everything you need in one directory.

When you open up your first test file, make sure you load 3IDRs (they take a while) and then click on the very top of the Resource Tree list (above 3IDR). Close your file and you should be good to run a script. When you run a script, assume your selection will start at this top spot. If you write your own scripts, have them end back at this spot, so that the next file can be navigated in properly.

When you add in swatches or image files, make sure they are also in the same directory and are in the same order as the files they correspond to.

In my example scripts, the $i variable refers to the number of SimPE files in the directory that I want to change. $j is a variable for the items within the Resource List panel.

The number of times you have to press tab to get to panels may vary depending on if you have the Resource Actions panel or other items open or not. This also may influence the panel number seen in the ControlClick command. Also note that sometimes tab doesn’t always take you in an order that makes sense. Test out how many tab presses it takes to get to items rather than just using the same numbers I used in my examples.

Having the scripts change more than one type of resource in a file wasn’t something I looked into, I wanted to keep things as simple as possible. Your mileage may vary.


That’s it for now: Go forth and create lots of Sims things! Don’t hesitate to reach out and ask questions if you need to!


magical_girl_sandbox: Inner Sailor Moon senshi triumphant after another fight. Tuxedo Mask took this picture. (Default)

Creating Sims 2 Body Shop files with AutoIT – V1.0: 06/26/2020


 ***WARNING: HIGHLY EXPERIMENTAL. USE AT YOUR OWN RISK!***

***For use with Windows OS only!***

A few months ago, I discovered AutoIT, which lets you automate mouse clicks. This was an absolute lifesaver for me. I was just about to create a metric butt-ton of Sims eyes for my eye set, and I had plans to do all of my texture importing in SimPE, which meant I just wanted a bunch of plain exported eye files. I really didn’t want to sit at my computer for a couple hours, importing Body Shop files and slowly giving myself carpal tunnel.

For some programs, AutoIT can interact with the buttons, write text in text spaces, and otherwise use the program the way a user would. This wasn’t an option for Body Shop sadly; AutoIT doesn’t recognize anything in the window as interactable. I got around this by telling AutoIT to just make a series of mouse clicks in very specific locations. I modified a script by the creator of AutoIT, Jonathan Bennett.

Let’s get started! First, you’ll need to download the AutoIT program, as well as the script. You can use the exe installer or the zip files for AutoIT, it doesn’t matter. Once that’s done, find the program in the AutoIT folder called Au3Info, and open it.


Use the small arrow keys on the right side to find the “Mouse” tab. This is what you’ll use to determine the locations of the buttons in Body Shop.


Now open up Body Shop. MAKE SURE YOU DON’T MOVE AROUND THE BODY SHOP WINDOW DURING THIS TIME!! You’re finding the location of the buttons on your screen as a whole, not within the window, so moving Body Shop around will throw everything off!

Open up the AutoIT_CreateSimsFiles script. It should open in Notepad or another text editor. $num is the number of files you want to create. You’ll likely change this often. $X1 through $X6 and $Y1 through $Y6 are the locations in x and y coordinates of the buttons you want to press on your screen.


Head to the “Create Parts” screen on Body Shop. Click the “Finder” tool in your Au3Info window. Drag it to your Body Shop program, and release the mouse button when it’s over the “Load Saved Project” button. You should get a set of coordinates in the position field in Au3Info. Mine are 706 and 395. Your coordinates will be different! The first number is the x coordinate ($X1) and the second number is the y coordinate ($Y1). Type this into your script file.


Now head to the Load Project screen. Use the “Finder” tool again to determine the location of your top project (Go ahead and create one if you don’t have previous projects already!). The coordinates for this button are $X2 and $Y2.

While you’re still on this screen, find the location of the “Load Selected Project” button for $X3 and $Y3. Try to drag the finder to the middle of the button for this one.

Load the project, and press the “Import to Game” button. This button is in the same location as the load button, so you don’t need to worry about it. Once it imports, use the finder to find the location of the “Accept” button that comes up. This is $X4 and $Y4.

Click accept. Now find the location of the “Cancel” button on the next screen. This is $X5 and $Y5.


Click cancel, and find the location of the “Cancel” button on this screen for $X6 and $Y6.

After you click cancel again, you’ll be back on the “Create Parts” screen. You should have values for all of your coordinates now. Go ahead and type a 1 in for the $num variable. Save your text file! You can also close out of Au3Info now too.


Open up the AutoIT3 program. It will prompt you to choose a script to run. Navigate to here you’ve saved the AutoIT_CreateSimsFiles script, and click open. You should get a dialogue box with a “Yes” button and a “No” button. Before you click yes, make sure the next window open underneath the dialogue box is Body Shop.

Once you’ve clicked yes, TAKE YA HAND OFF THE MOUSE! Your cursor will automatically move itself. Note that there is a pretty large delay between mouse clicks, so wait a bit before touching anything. If everything goes according to plan, you should have just created one Sims file. Yay!

If for some reason it doesn’t work, check your coordinates. If you moved the Body Shop window at any point, your coordinates and clicks will be off.

You’re done with the hard stuff! You can now use your script to create any files you want. Just change the $num variable to the amount of files you want to create, and make sure the projects you want to import are in the top of the list in the “Load Project” screen. Once again, don’t move the Body Shop window at all, and don’t move your mouse while the program is running. You won’t be able to use your computer while this is going on, which is not fantastic, but you can go do other things. Read a book, take a shower, dismantle capitalism, knit a sweater! I once set up the script to create the files for my skin sets while I ran to class. Efficiency!

Let me know if you have any questions or run into any problems! 


Advanced Info

AutoIT uses a “Basic-like” coding language, but is fairly similar in syntax to other languages. Semi-colons (;) are your comment out characters, and dollar signs ($) are placed in front of variables to write them to memory or call them in.

I intentionally set the delay between mouse clicks to be large because my computer is a dinosaur. If you want to change this because your computer is either from the Precambrian or you stole it from NASA, scroll through the script until you find the code chunk starting with “; Execute the loop $num times”. You’ll see three lines that start with “AutoITSetOption”. Check out the number after "MouseClickDelay" in those lines. That’s the number of milliseconds (1/1000s of a second) you want to delay the following clicks by. I’ve set it to 1000 milliseconds (1 second) for the first click, 6000 milliseconds for the second through fourth clicks, and back to 1000 milliseconds for the final three clicks. Change these to whatever numbers you want.


Back to Navigation

Profile

magical_girl_sandbox: Inner Sailor Moon senshi triumphant after another fight. Tuxedo Mask took this picture. (Default)
magical_girl_sandbox

Most Popular Tags

June 2025

S M T W T F S
12345 6 7
891011121314
15161718192021
22232425262728
2930     

Style Credit

Syndicate

RSS Atom
Powered by Dreamwidth Studios